A Lathe for my grandson (part 1)
Making a 1/12 scale model lathe
Of my three kids, only daughter #1 seems to have acquired my passion for woodworking, and none have yet expressed an interest in machining. I’ve decided to start indoctrinating grandson #1 into the mystical arts of machine tools. Somebody needs to inherit all my metalworking equipment!
Though I hardly believe it, my grandson is already three years old. Some might think that a three year old is unlikely to appreciate a model lathe that he probably won’t be allowed to touch, but my plan is to build a machine tool every year until I’ve made him an entire 1/12 scale machine shop. By that point, he’ll probably be almost a teenager and will hopefully enjoy playing with them.
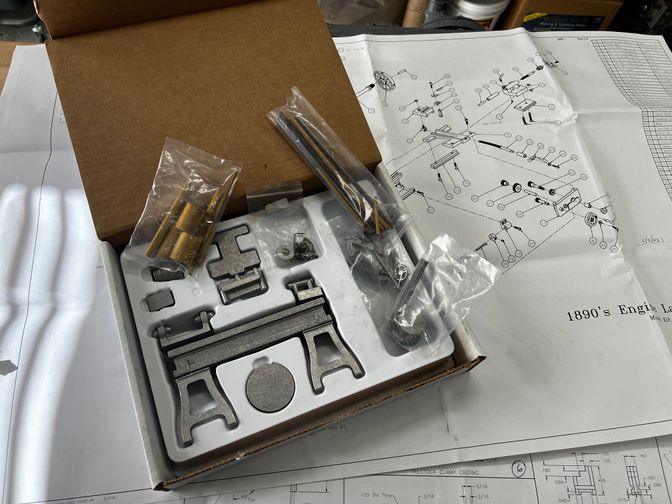
I bought the castings (actually a full kit including raw stock) from PM research. Here’s what it will look like when complete (though I expect to paint mine something other than gray):

It’s a very nice kit, with cast aluminum parts and everything you need to build the lathe (sans a working lathe, vertical mill, and assorted tooling):
This will hopefully be a fairly straightforward build, as I’m pretty much following Joe Pieczynski’s outstanding build series exactly. Any deviations are most likely due to my misunderstanding or differences in available tooling.
In particular, I decided to follow Joe’s excellent suggestion to start with the smallest stuff to build confidence. When I finally get to some of the larger (!) castings and full assemblies it will be like dessert.
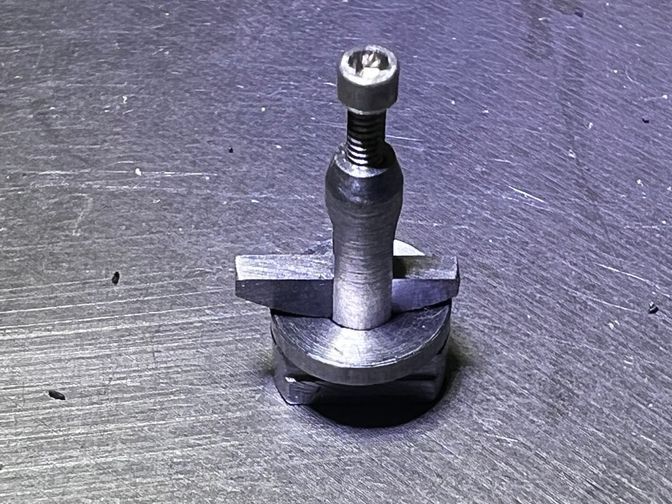
Here’s the first part I completed, the old-fashioned rocker style toolpost:
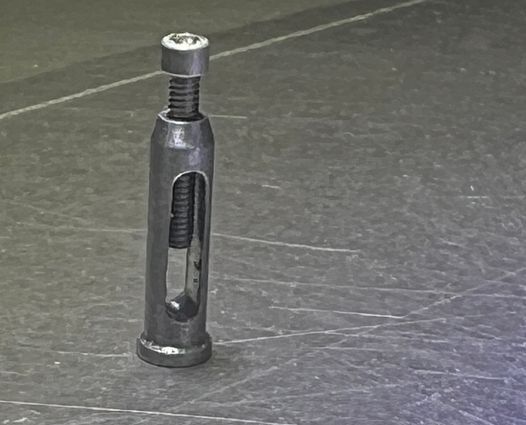
It’s hard to express just how tiny some of these parts really are:

Here’s the completed toolpost assembly. Note that this is a working model! I should be able to grind a cutting tool and actually turn parts in this thing when I’m done. I was pretty proud of myself for boring the countersink hole precisely in the tee-slot base such that the toolpost itself is recessed slightly. There is a slight mismatch in the radius of the rocker and the dish, but this was some fiddly work!
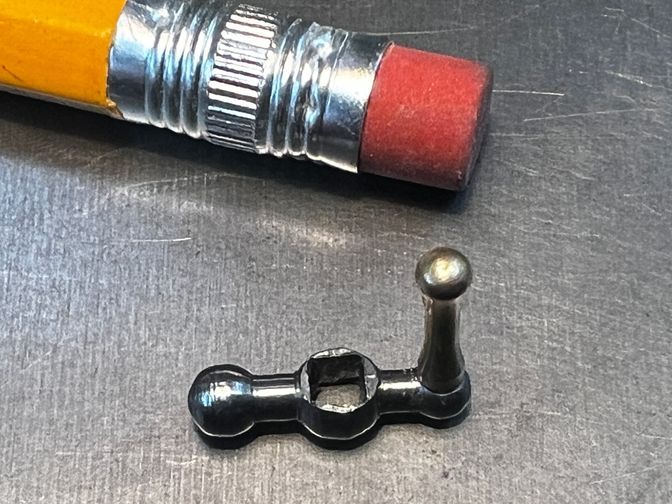
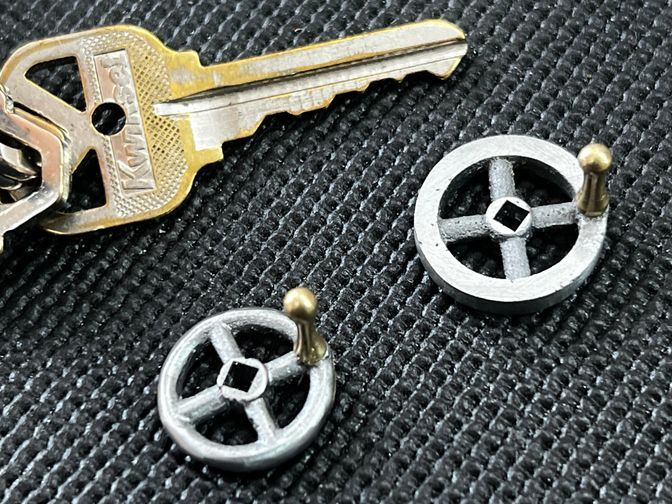
Next up were the handles and handwheels for the compound, cross-slide, and tailstock.
I made the square hole in the compound handle with needle files before realizing I needed to make two more square holes exactly 0.100” X 0.100”. That was fiddly enough work that I went ahead and made a dedicated broach:

I made it from O1 tool steel, coated it in boric acid to prevent oxidation, heated it to cherry red, then quenched it in oil to harden it. I then tempered it with a torch to a light straw color. Hardening it was probably unnecessary since the parts are aluminum, but I might use it again someday on something harder.
Once the broach was made, the handles were pretty straightforward (if fiddly):
That’s as far as I’ve gotten so far. I’ll post more updates as I progress.