Heat Treat Oven
Modernizing a cool old oven
A bunch of like-minded friends and I attended a meet-and-greet at the Laney College machine shop several days ago (great shop and fantastic program, by the way).
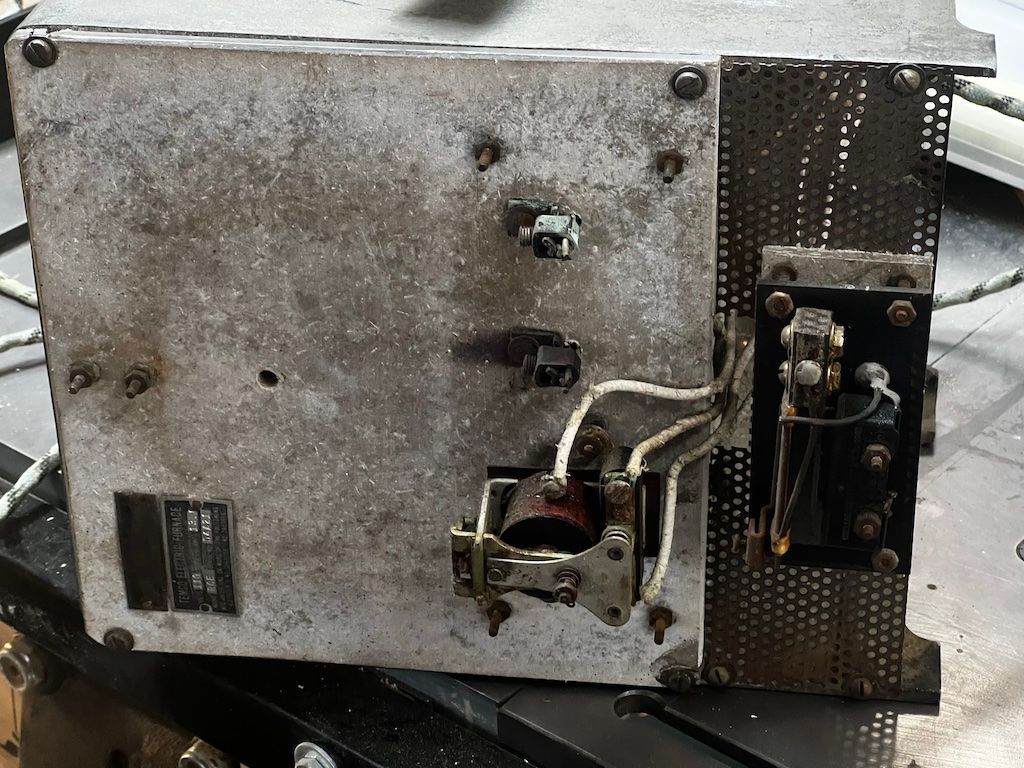
I managed to walk away with this cool antique laboratory oven after a small donation to the school:
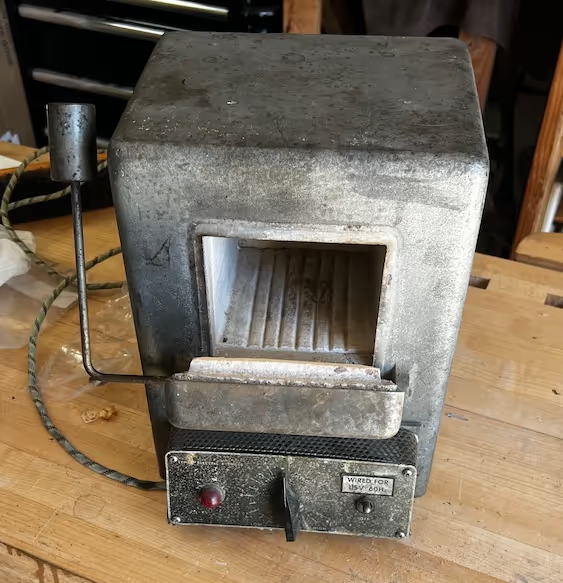
As acquired
While the oven was kinda sorta “working” as is (sans any pretense of safety or means of even estimating temperatures), there is nothing I enjoy more than turning an old neglected machine into a truly useful tool.
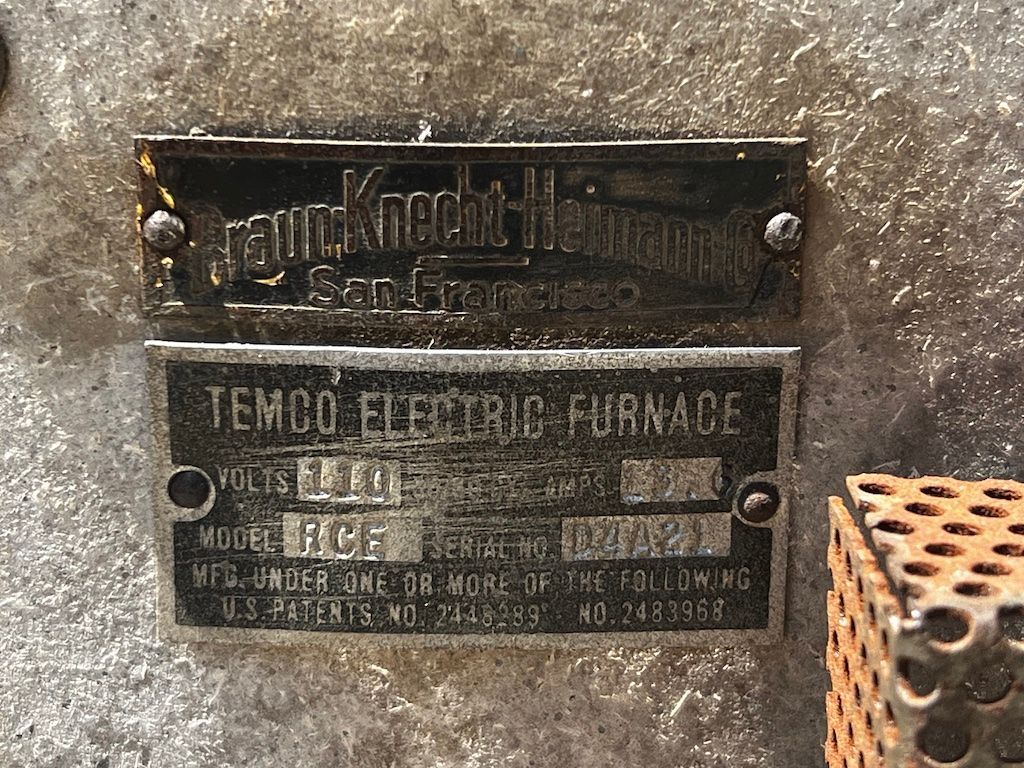
Based on the machinery tags, my best guess is that it was originally made sometime in the early 1950’s. The tags reference a patent from 1948, and the Braun Knecht Heimann company (“Assay and Mining Laboratory Supplies and Chemicals”) was acquired by VWR in 1950:
The structural parts of the oven were all in pretty great shape, with a nice satisfying “patina” of grime and wear. Doubtless, all of the insulating panels contain mostly asbestos, but the inner heat brick/refactory material all seemed to be in good shape, as did the cast aluminum exterior and the gate mechanism.
When I first brought the thing home, I had to plug it in to see if it would even warm up, of course. It did! But there was a lot more buzzing and clicking than made me comfortable, and the plug into the wall socket became scarily hot to the touch after less than a minute under power, so I shut it down quickly.
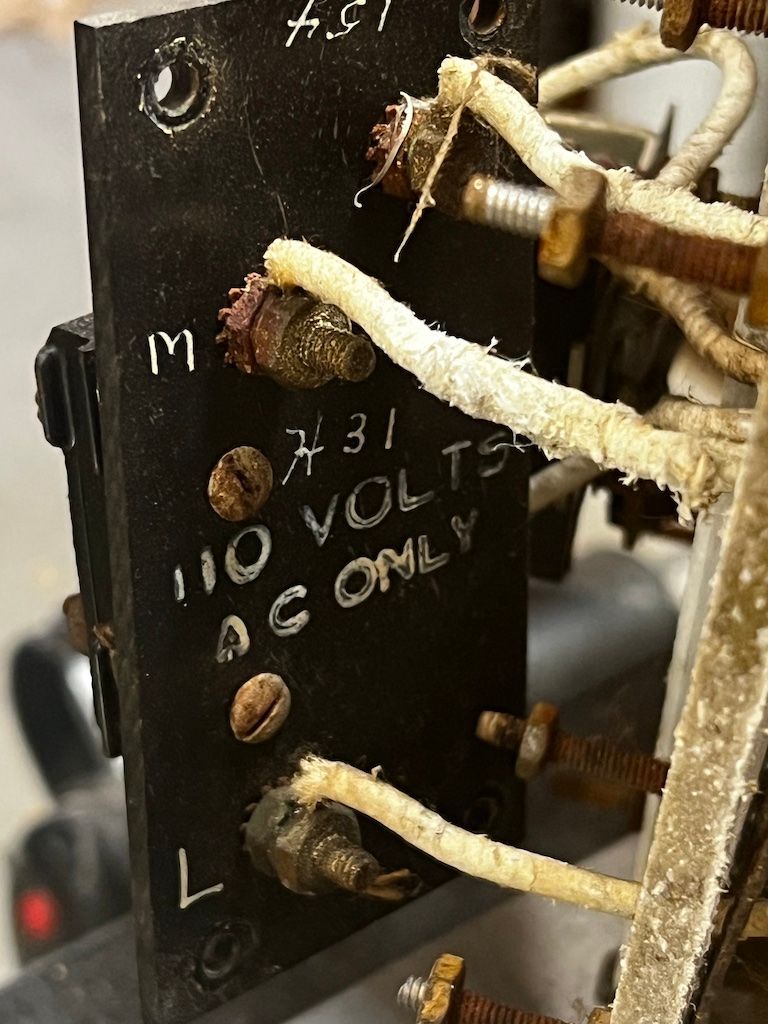
The original didn’t have any sort of temperature monitoring except for a bimetal relay outside the heated chamber (the patent mentioned previously). Temperature control was basically just “low” to “high” based on the rheostat setting on the front panel.
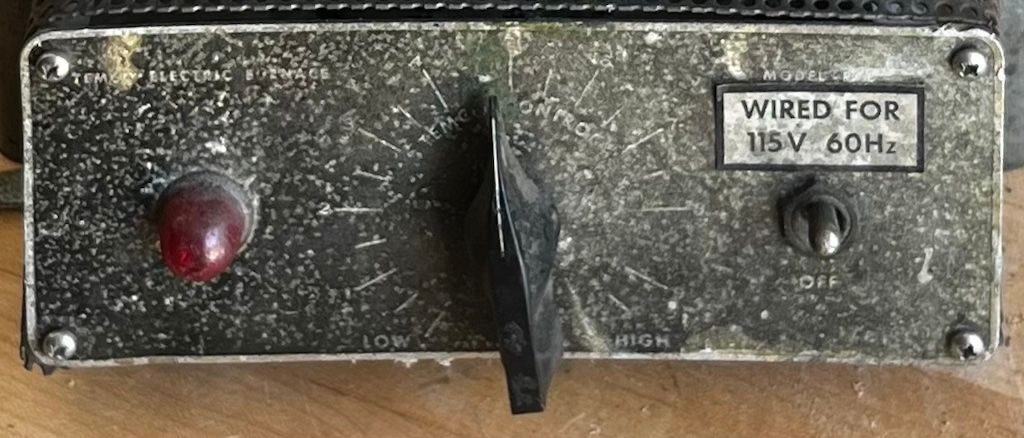
The front panel was mounted to some standoffs that appear to be made out of bakelite (presumably impregnated with mica or glass). They seem to hold up to the heat from the oven pretty well (there is a ~⅜″ thick asbestos panel between them and the cast metal exterior of the oven)
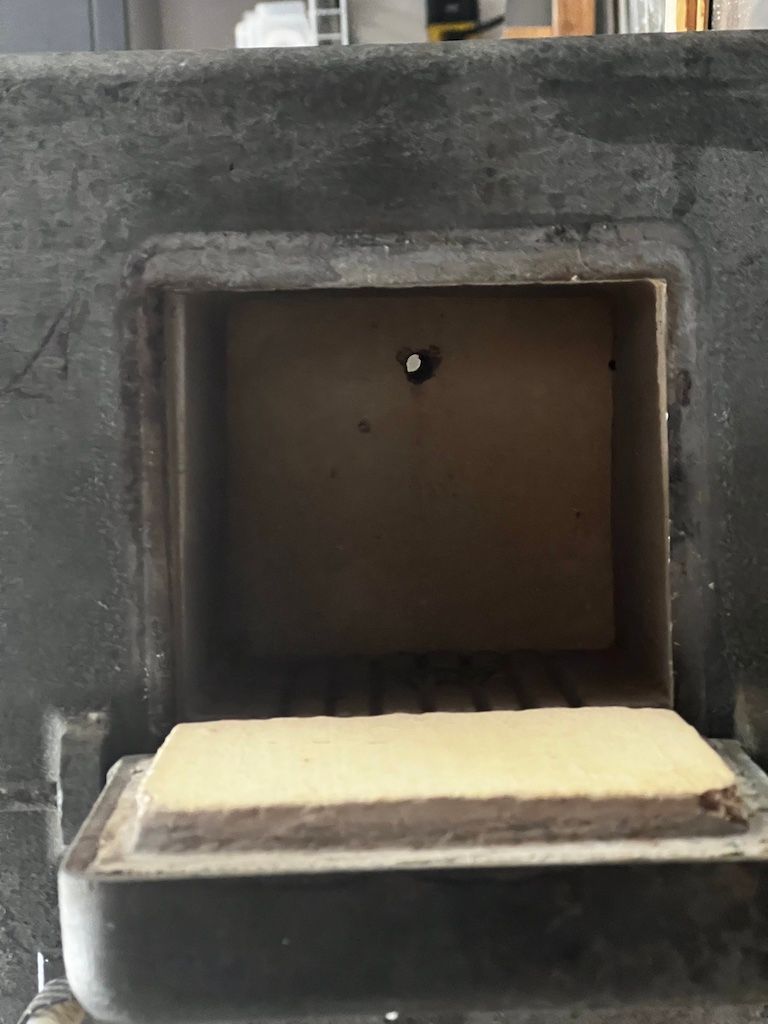
The interior of the oven is pretty small: 4 ¾″ wide × 4 ¼″ high × 5 ½″ deep. Fortunately, most of the the parts I expect to heat treat are also fairly small (and I have friends with larger ovens for when I need something larger). I can fit most of my woodworking plane blades inside the chamber at a diagonal (all but the largest jointer plane blades).
I originally planned to salvage as much of the really cool looking antique electrical stuff as I could, but most of it was too corroded and rusty to really be salvageable. Ultimately, I valued having a useful tool more than keeping the antique aesthetic.
Non-original parts
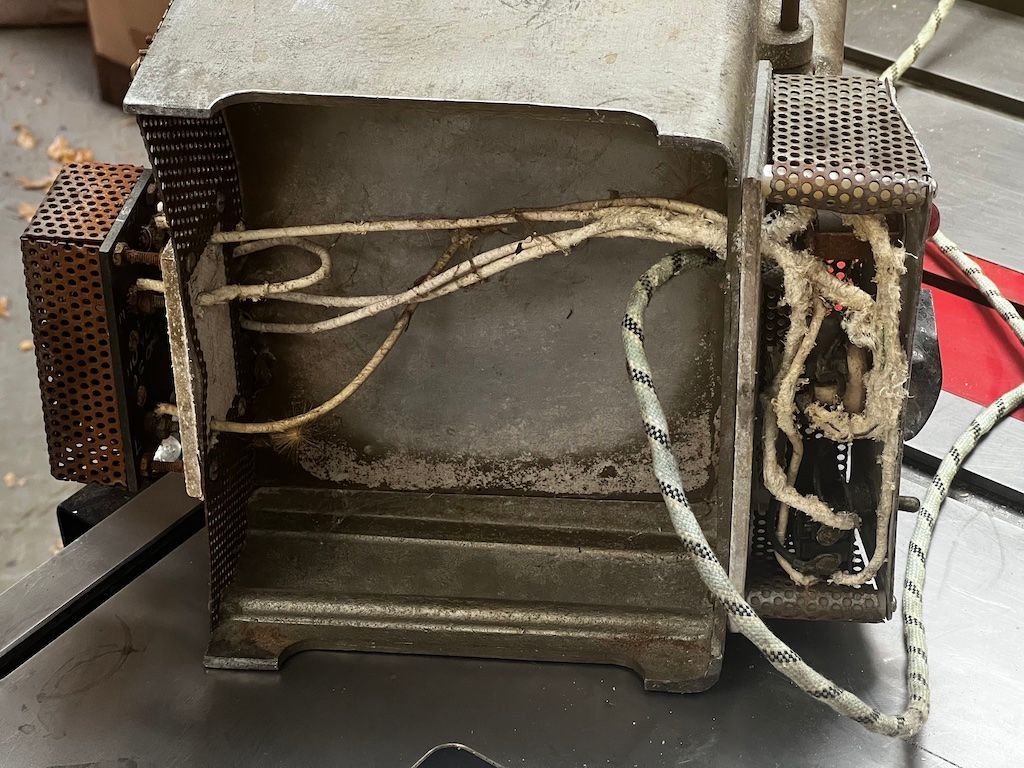
As I disassembled the thing, it became increasingly apparent that someone had done some work on it previously. There were a few holes and such that had clearly been added afterward to route some wires differently, and the power cord definitely wasn’t original. There was also a small hole poked through from the back side into the chamber itself, presumably for a temperature probe of some sort, but it wasn’t clear whether or not that was original or ever used.
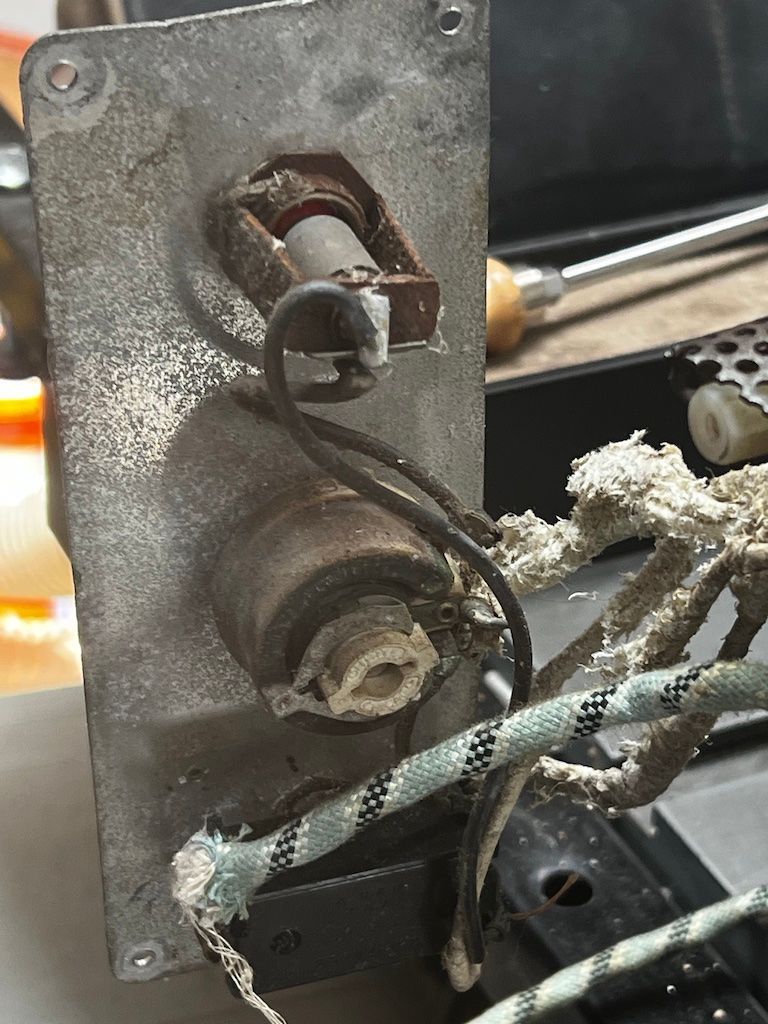
That power cord seemed so familiar for some reason:
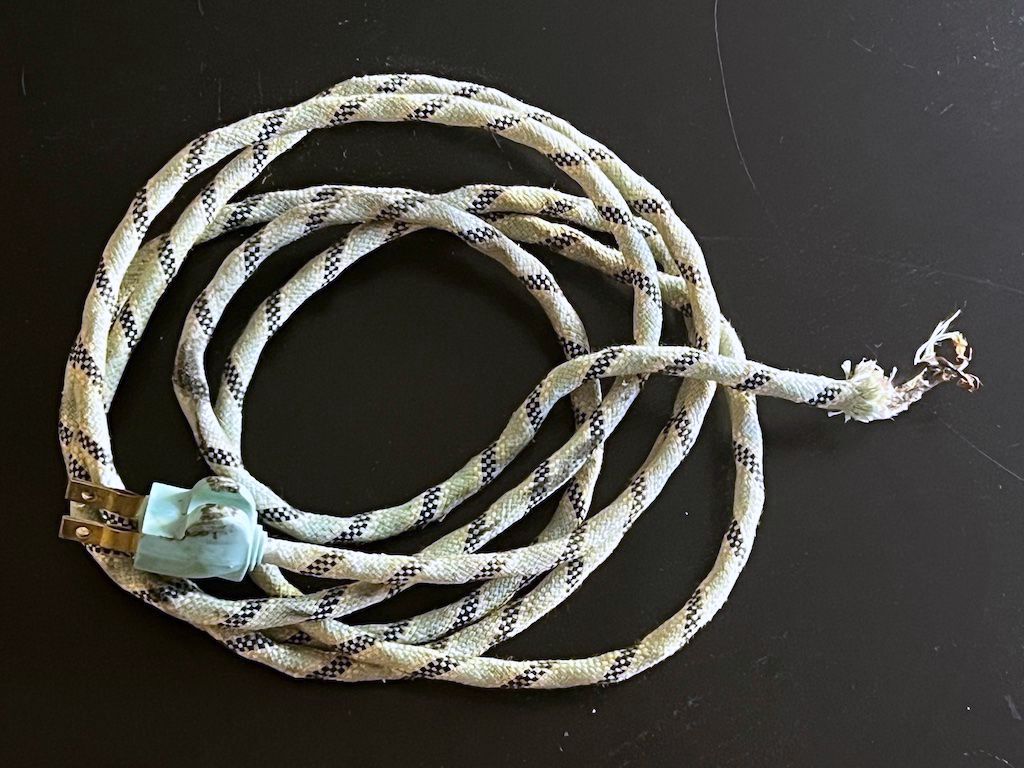
Then it hit me: that was the EXACT same plastic plug and fabric covered power cord that was on my mother’s clothes iron when I was growing up. That specific shade of bluish green just screams “the sixties” to me. I’m 99% certain that someone stole a power cord off of an iron to try powering the thing up sometime in the sixties or early seventies, and on it stayed (reasoning: “Hey, clothes irons get hot, that cord should work!”).
Modern controls
I wanted to use the oven mostly for heat-treating small pieces of O1 tool steel for various projects (mostly woodworking or metalworking cutters that need to be hardened and ground). I expect I’ll also use it to melt aluminum and low-temperature casting metals to cast small parts, as well as to silver-solder various assemblies that would be expensive to machine out of solid stock or difficult to weld together.
That meant I needed a way to control the temperature reasonably accurately.
I’m actually a college educated electrical engineer, but I’ve quite literally forgotten almost everything I learned about the topic back in the prior millenium. I do remember really enjoying my control systems classes, though. Industrial control is just so cool!
Anyway, the modern way of controlling a system like an oven is with a “PID controller” (feeding back an error signal adjusted with proportional, integral, and derivative gain values).
So I purchased a high-temperature K-type thermocouple with ceramic insulation, a PID controller, a solid-state relay (SSR), and 25’ of mica/fiberglass insulated 10 AWG wire quite inexpensively on Amazon. Like most offshore manufactured components on Amazon, these prioritized price over quality, but since I never plan to use the oven unattended, my priorities were similar (within reason).
I happened to have almost everything else I needed on hand, including crimp connectors, sheet metal for a custom enclosure, and a length of nice SOOW 12 AWG power cable (S: service cord [600V], OO: oil resistant inside and out, W: weather resistant).
If not for somehow misplacing the original SSR I ordered (I still haven’t found it) and my apprentice (ahem) somehow miswiring the first controller I ordered (sending 120VAC directly into the thermocouple sensor), I could have rebuilt the oven for just a little more than the cost of a tank of gas (albeit, at crazy California gas prices).
The (re-)build
Step 1 was to remove all the ratty old wiring and horribly corroded, rusty, and plain icky electrical components.
I then enlarged the hole into the chamber, and mounted the thermocouple to the back. The thermocouple comes with multiple ceramic insulators, each about an inch long, so shortening it for my needs was quite easy: I just removed four of the insulators and cut the leads shorter.

(Yes, that bracket is crooked as all get out. No, I have no idea how I managed to screw that up so badly. Yes, it bugs me, but I’m leaving it. Go away kid, you’re bothering me.)
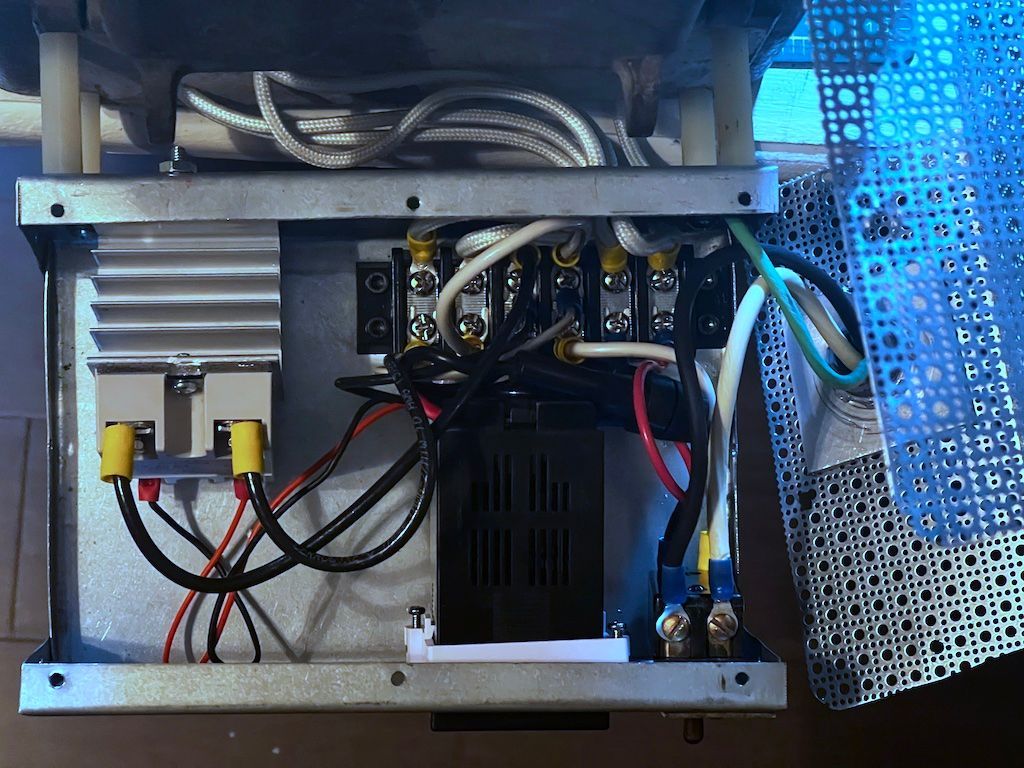
It turned out that 25’ of the insulated wire was just barely enough. I used up almost every inch. Note that the cage around the heater element connectors now has a safety ground. The cage around the thermocouple isn’t, but it doesn’t see line voltage, it just keeps hands away from the (temperature) hot connector.
Ten gauge wire and a 40A SSR are definitely over-spec. The oven draws about 13A at 120VAC while heating, and I’m using a 15A fuse, but I wanted everything to run as cool as possible with a healthy safety margin, especially as there is (currently) no fan in the enclosure.
Making a new enclosure
I bent up an enclosure using and hacked out holes in the front panel for the controller and a power switch. Only after I cut the hole did I realize my panel switch was only SPST. Unlike a light switch in the wall, it’s really best if an appliance severs the connection to both line and neutral when the switch is off. Otherwise you are dependent on the neutral line being properly grounded externally at the main panel.
Fortunately, after a good soak in contact cleaner and some time with a wire wheel in a Dremel, the original DPST switch was working reliably. So I cut out a piece of the original front panel to use as a patch over the now too-large hole, and re-purposed the “vintage” power switch.
The enclosure is actually a little more cramped than I’d like, but I didn’t want to cantilever it out any further. Those little bakelite standoffs are all that secure it to the oven.
Unfortunately, there is precious little room for a fan. A DC muffin fan will require a small 12V power supply as well. I do want to add some sort of fan, though. The heat sink got to about 130°F after getting the oven to maximum temperature after constant heating for a couple of hours. That’s not too bad, and the enclosure itself was still cool enough to keep my hand resting on it, but a fan is warranted. I’m still thinking through my options for adding a fan.
Final results
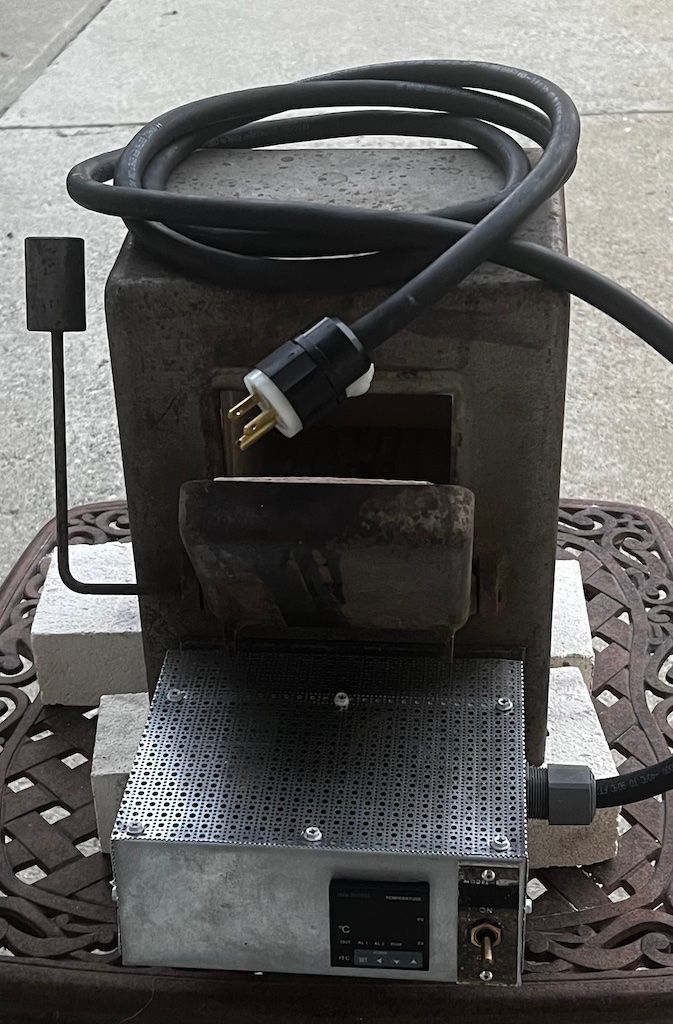
Here’s the a view of the complete assembly:
Once I finally had everything wired up correctly (and replaced the components I either lost or blew up!) I set the controller to manual mode and just let it run with the SSR turned on continuously for 2 ½ hours. I manually checked the reported temperature every ten minutes or so, producing this graph:
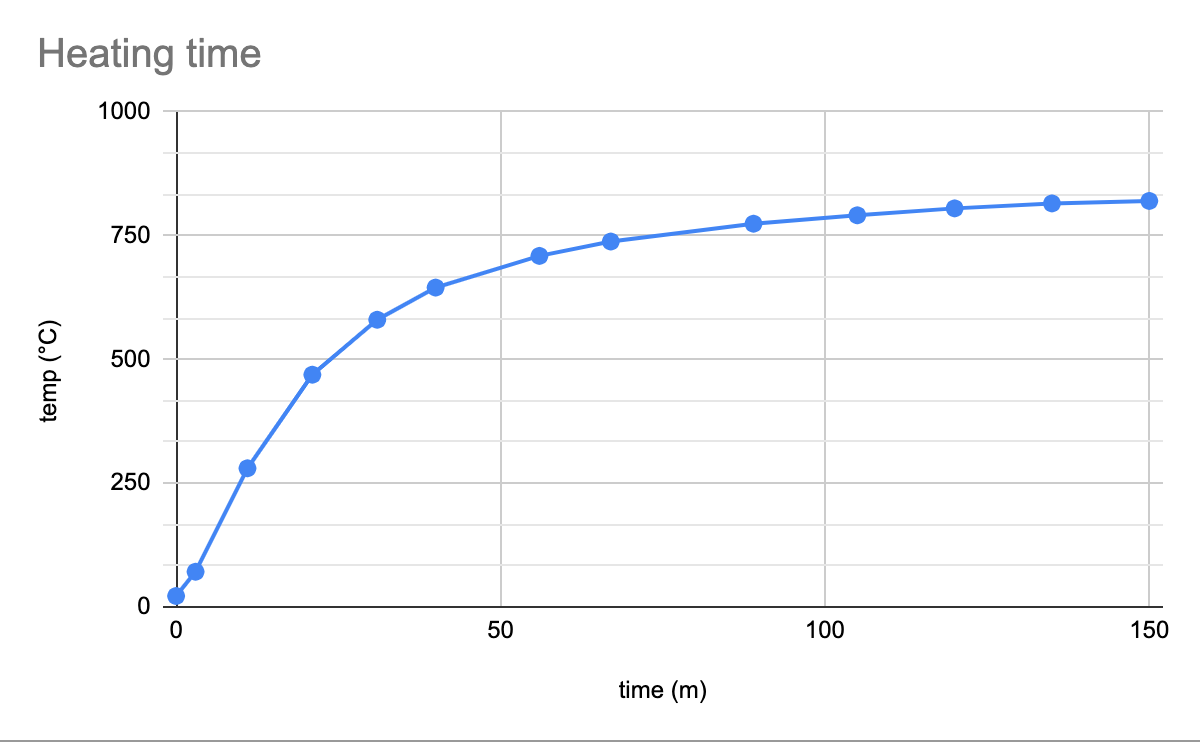
It reached a maximum temperature of 820° C (1508°) F in exactly two hours and thirty minutes. With such a small chamber, I was hoping to be able to get it up to 850° C or more, but I think this is about the best possible result for a 15A 120V circuit. I’d rather not have to replace the heating elements, nor rewire for 240V for convenience sake. 820° suffices for my needs.
Since I want to use the oven at a variety of temperatures for various tasks, I used the auto-tune function of the controller for a set point of 400° C (about half the maximum temperature)
The controller uses weird terminology for the PID parameters. As near as I can
guess from the Chinglesh instruction manual, P is the proportional constant Kp,
M50 is the integral component normally called Ti, and t is the
derivative component normally called Td.
I’m unsure, though: the documentation defines P, M50, and t as “Differential”, “Integral
time” (with units of degrees??), and “Hysteresis time”, respectively.
After auto-tuning for 400° C, the values obtained were:
- P: 160 (supposedly, this means 1.6 S / °C)
- M50: 528 (supposedly, this means 52.8° C)
- t: 112 (supposedly, this means 112 seconds)
I’m pretty mystified by these names and values. Surely P is “proportional” and not “differential”? If anyone understands this particular controller terminology, please let me know!
Regardless, the oven is working perfectly for me with the auto-tuned parameters above. It reaches 580° C (about 1000° F) in roughly 30 minutes, and reaches max temperature (enough to harden or anneal 01 tool steel) in under 3 hours.
The only remaining work is to add a fan to the enclosure, but I’m still debating the necessity.
All in all, this was a fun little project and produced a useful tool!