Hirakoubai and kaeshikoubai
Right triangle magic: how to layout common slopes. Part 7 in a series.
This is part seven in a series of posts:
- Sashigane 1: Introduction
- Sashigane 2: Traditional Units
- Sashigane 3: Physical design
- Sashigane 4: Hyoume and Urame
- Sashigane 5: Kou, ko, gen
- Sashigane 6: Simple usage
- Sashigane 7: Right triangle magic (this post)
Why bother?
Before going full-nerd and explaining all this dry geometry stuff, let’s give a preview of where we are heading.
Here’s the kind of model mentioned in the last post that I’d like to construct. It models the corner of a “simple” temple roof:
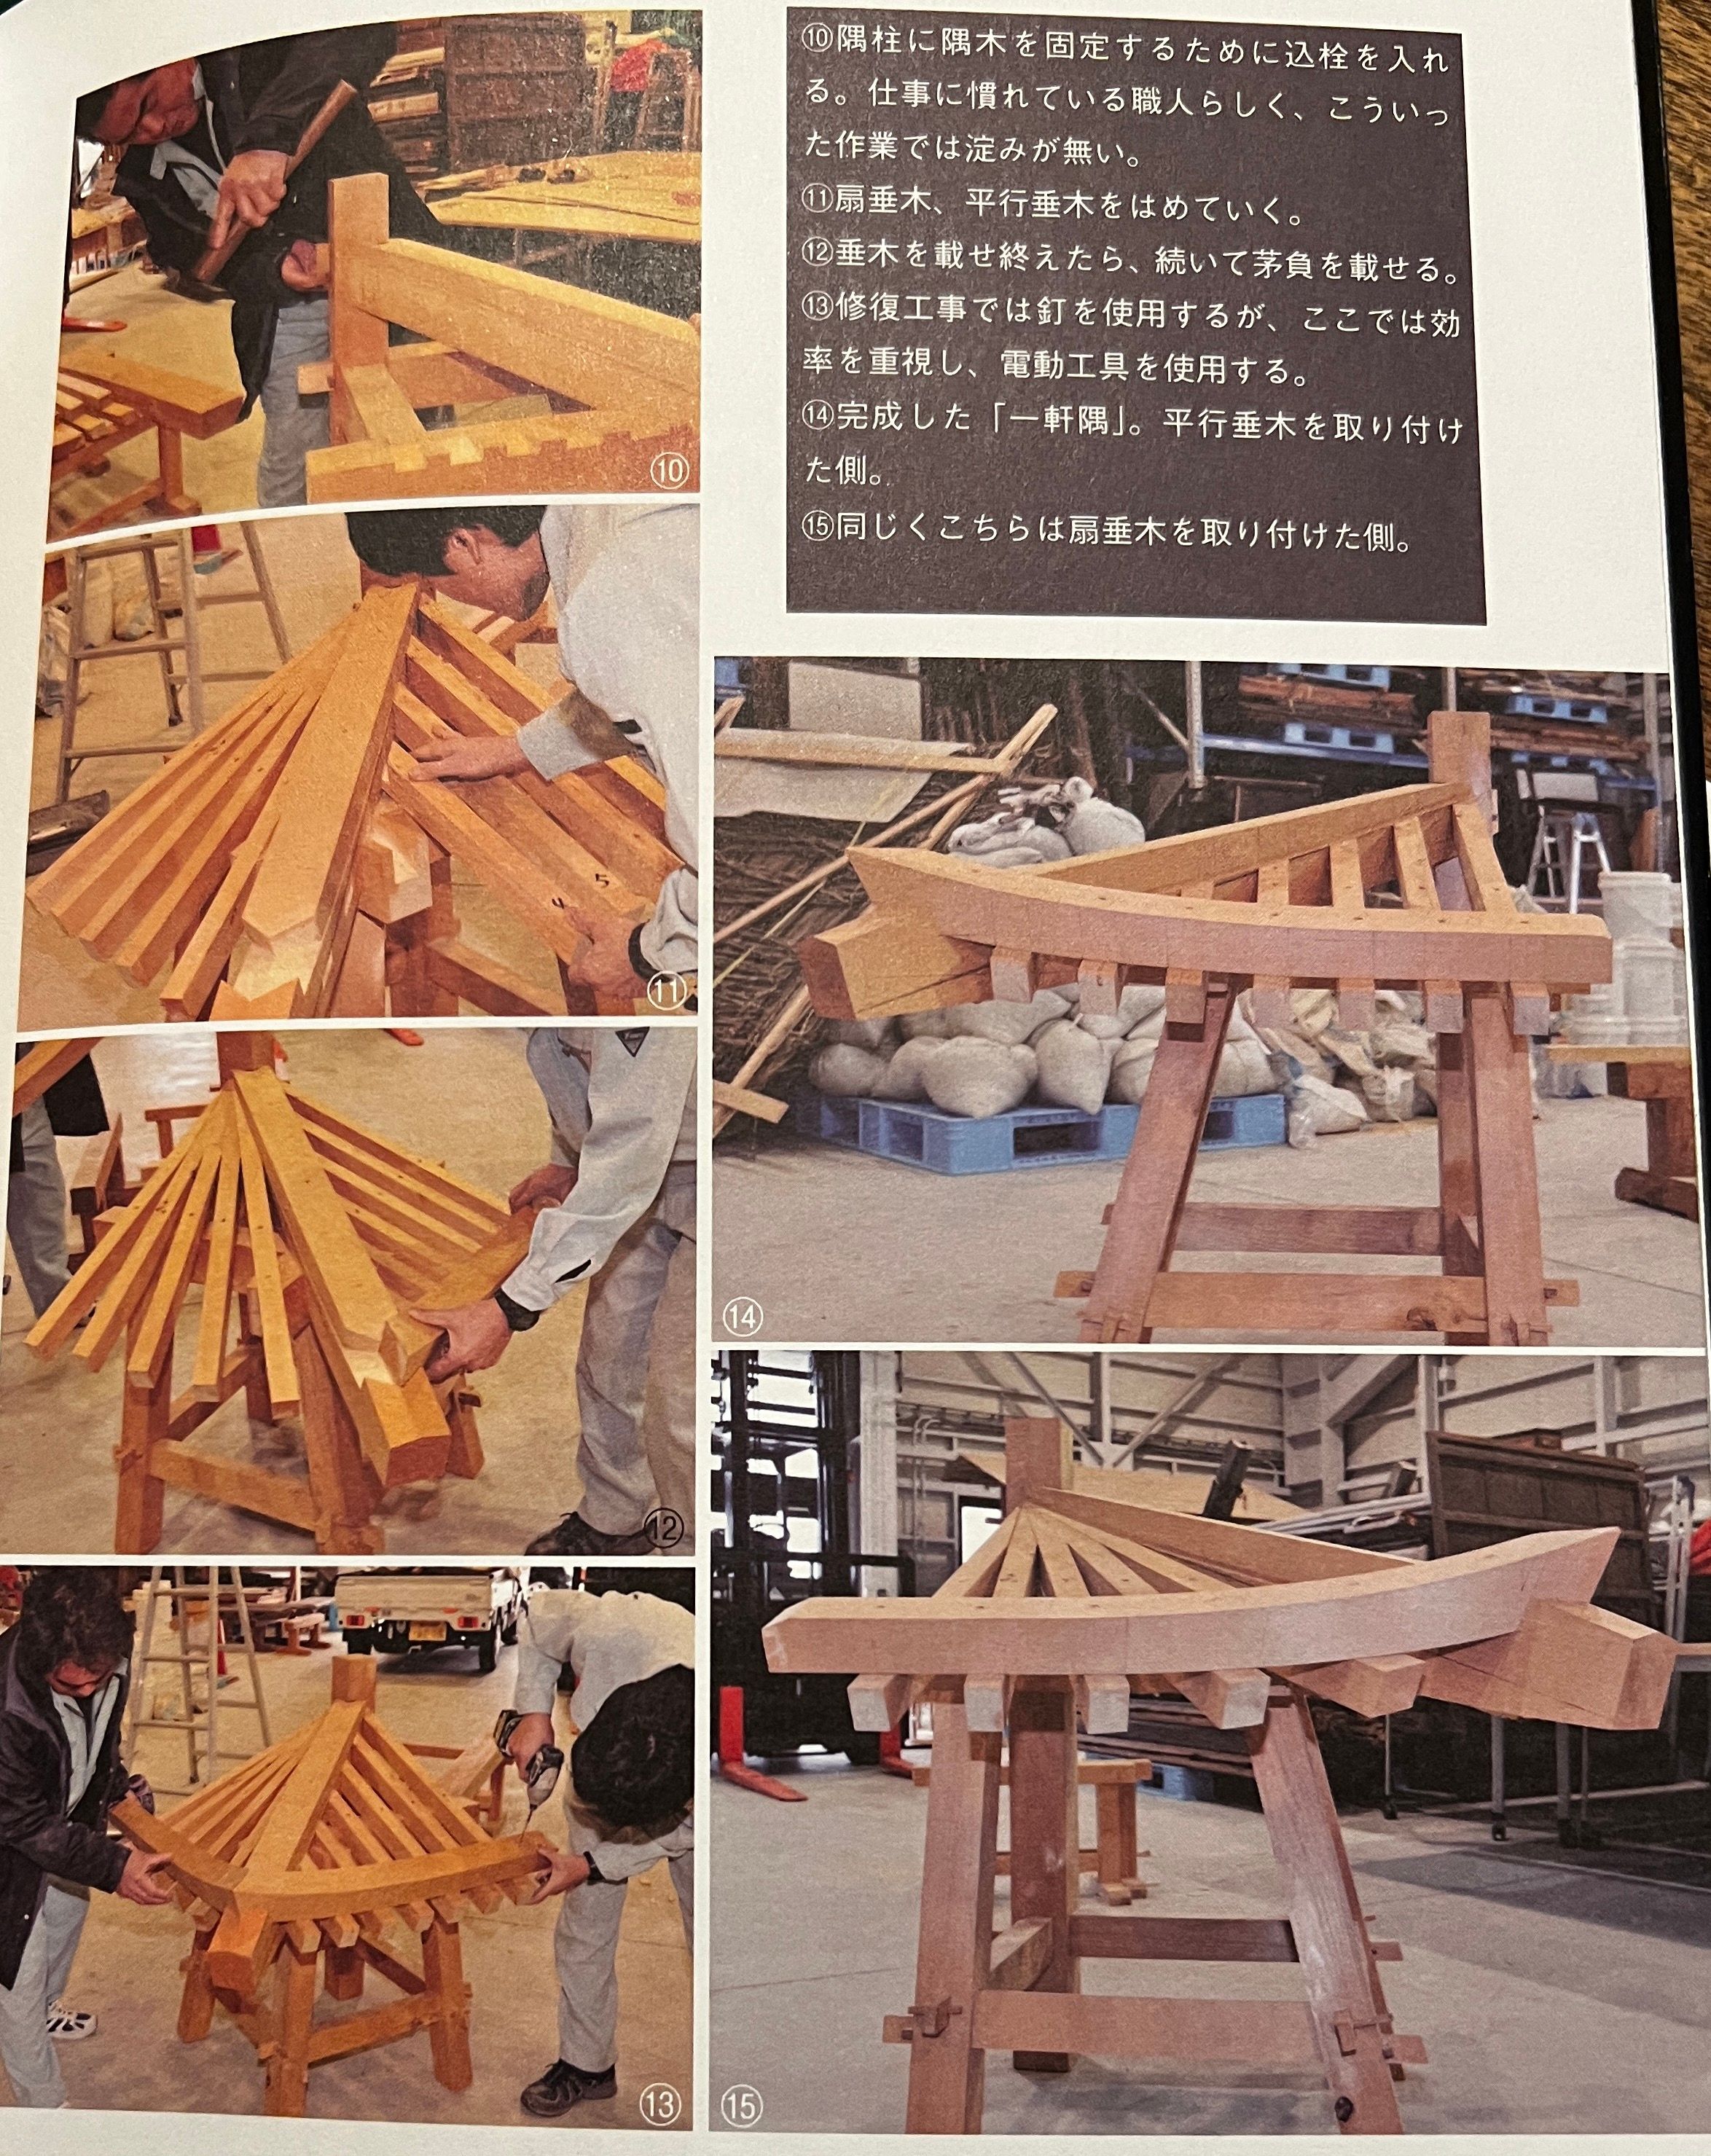
Take a closer look at those images on the left: every one of those rafters seat in a mortice that holds the part at exactly the correct angle to hold the roof in a flat plane. Every part joins perfectly, and all the compound-angle cuts fit precisely, even in the corners with those compound angles.
I hope to be able to produce that kind of joinery before I die. Part of it, of course, is skill with chisels, saws, and planes, but it all starts with layout.
Believe it or not, the layout for that entire model can be achieved with a single sashigane and the geometry tricks explained in this series.
Fundamentals
To review: We’ve already discussed that Japanese carpenters (大工 ) always use slopes (勾配) to describe angles, not degrees or radians. A slope is a rise over a run, and it’s helpful to know the names of the parts:
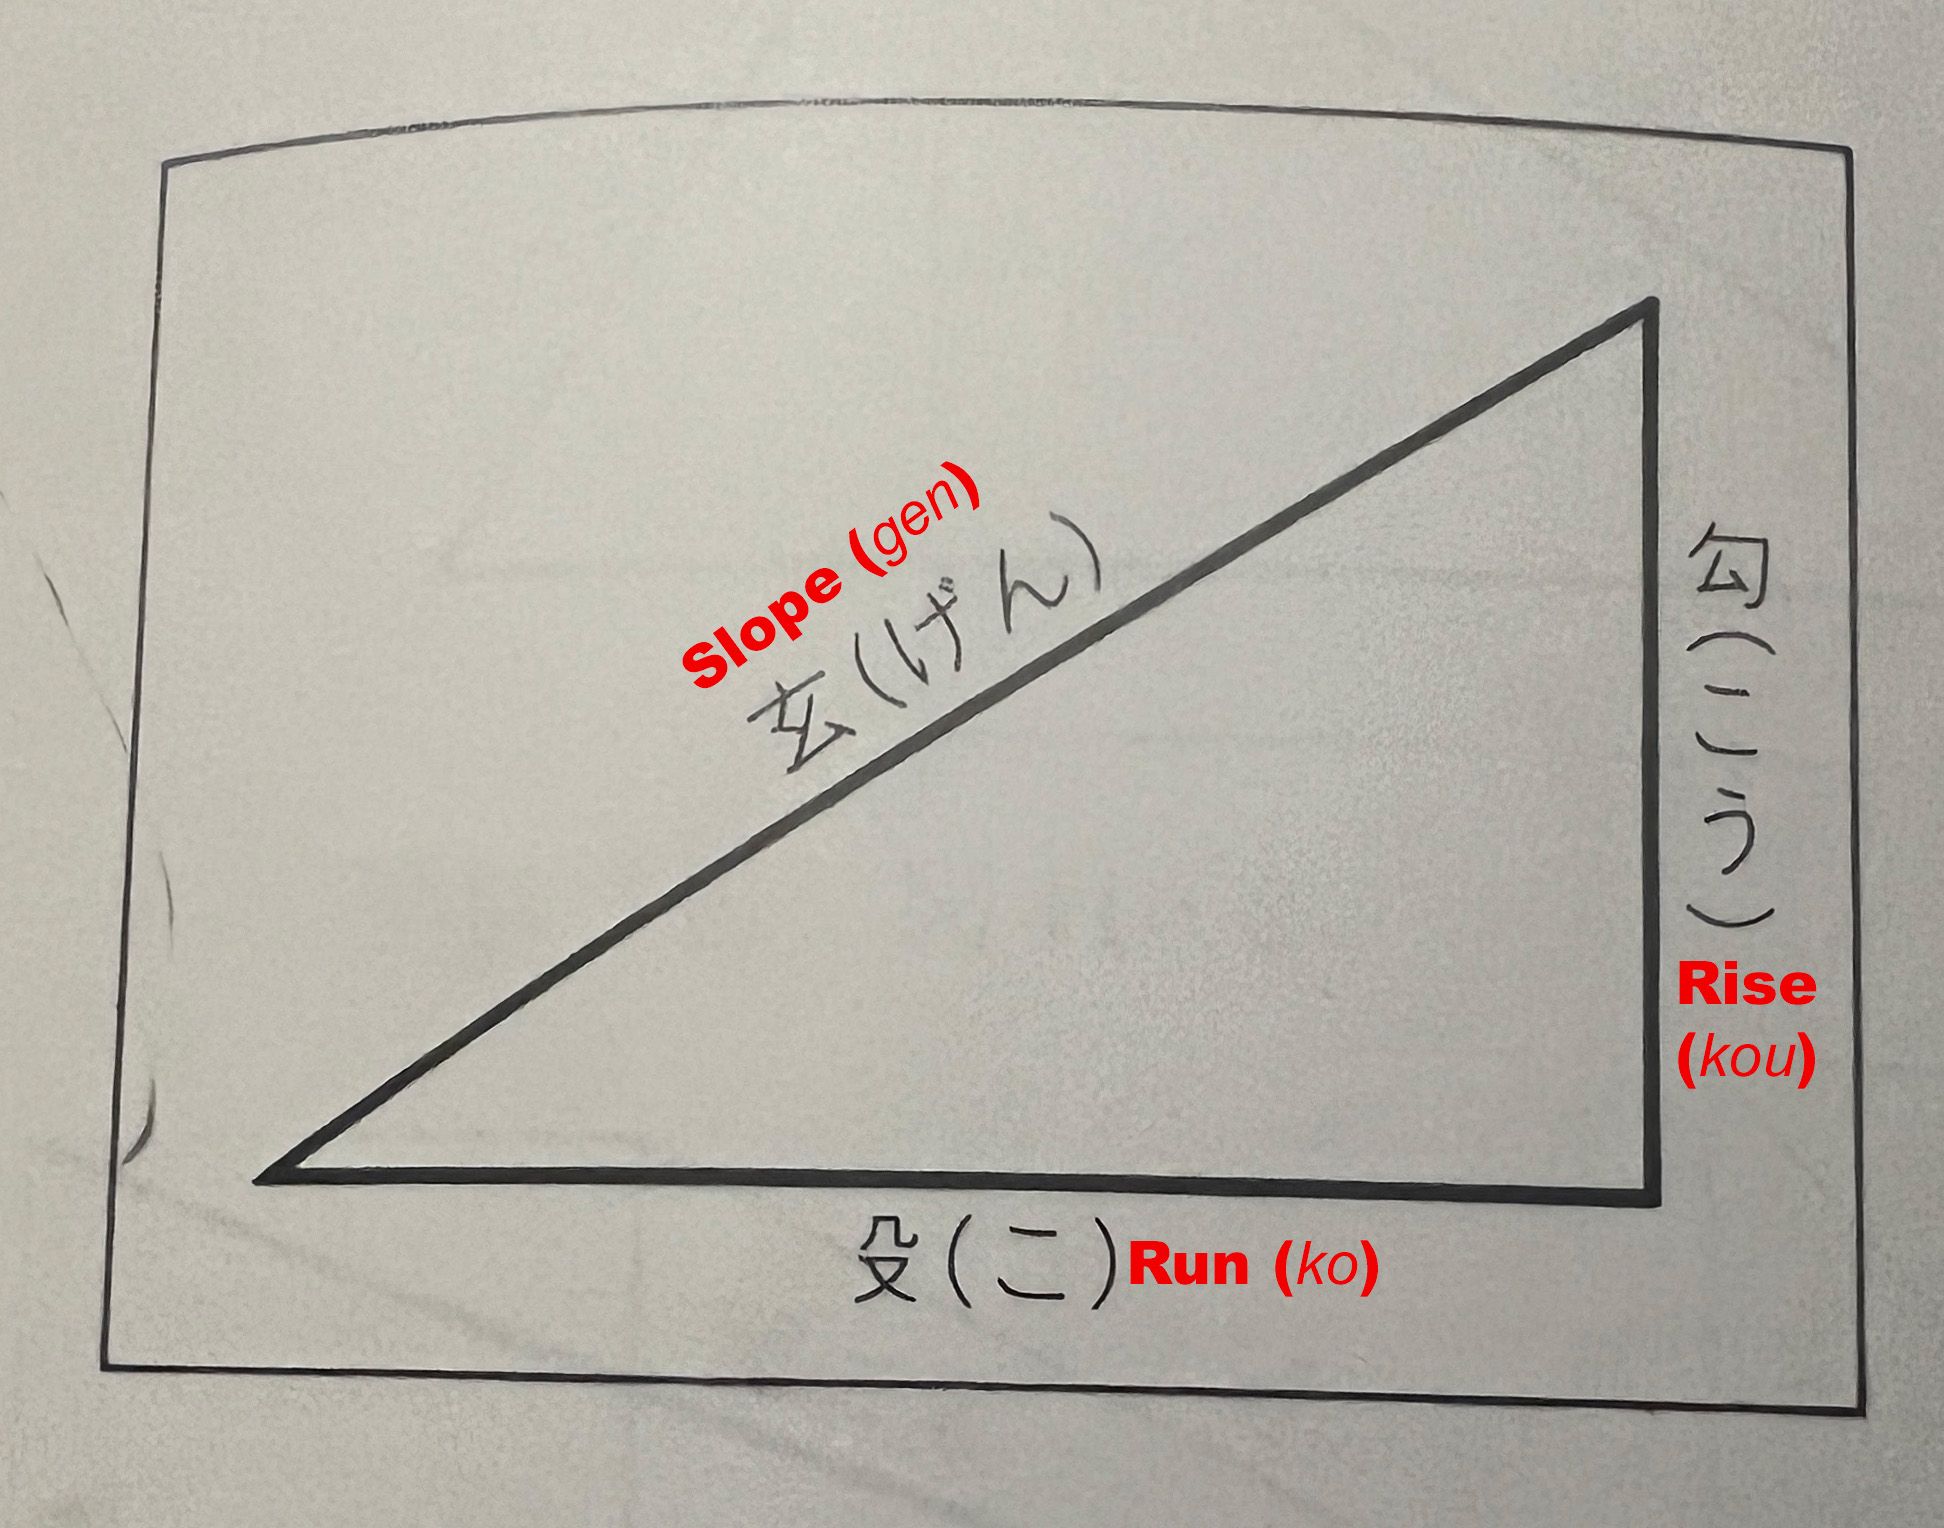
I’ve labeled the gen as “slope,” but “hypotenuse” is probably more correct. Somewhat amusingly, the kanji character actually means “mysterious, occultness, black, deep, profound”. It’s also a component of the character 弦 which means “chord” or “bowstring” and is also pronounced gen.
In other words, and more practically, the gen is a taught line between the start of the run and the top of the rise!
I may be a little old to still be a padawan early in my journey, but the foreshadowing from all of that gives me shivers!
Laying out angles slopes with a sashigane
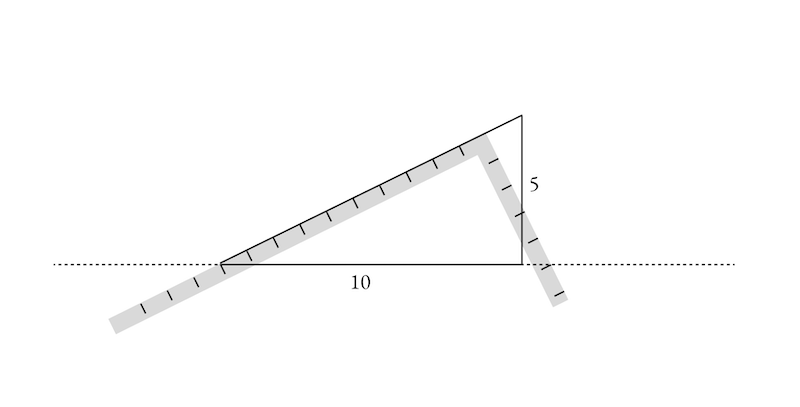
Let’s say someone asked you to draw a line with a slope of 5寸 koubai or a slope of 5/10.
The most direct way would be to draw a horizontal line of some fixed, but convenient length, say 10寸. Then draw a vertical line from the right end that’s exactly half that length (5寸). Then draw a “taught line” between the “start of the run and the top of the rise” to create the sloped line.
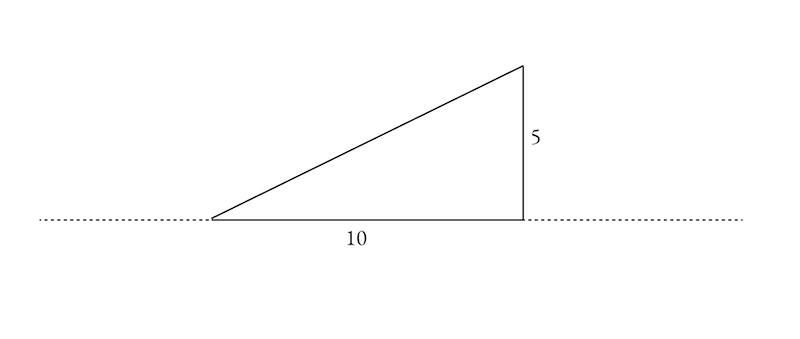
But that’s way too much work.
The more practical method that any 大工さん (carpenter) worth his salt would use is to hold is sashigane up to a straight line of any length. He’d tilt the tool to align the mark on one arm to read exactly half of what was on the other arm (say 6 and 3 rather than 10 and 5). Then he’d strike his line (along the long arm of the sashigane, sliding and extending as necessary):
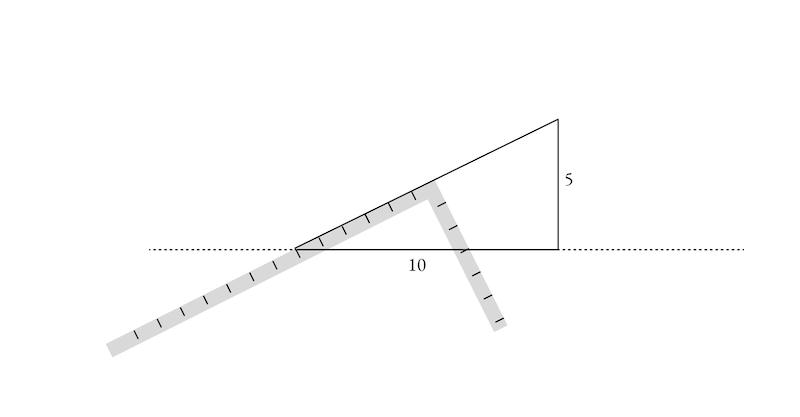
Of course, this works for any two numbers in the same proportion. It’s just as true with the original lengths of 5 and 10: the length of the struck line will be different, but the slope (and angle) will be identical:
This is important!
This is not as obvious as it seems. It seems easy if you simply read and look at the diagrams. But doing it in practice requires, well, practice.
Notice that in the original diagram, the run, or ko, was 10. But we used the ko dimension on the long arm to strike the angle. Also, the kou is no longer a vertical line, it’s now the same length, but tilted off vertical.
This is inevitably confusing at first. Just remember that the slopes remain the same, but the lengths differ. Also remember that the sashigane will always describe two slopes, the hirakoubai that’s less than 45° and the kaeshikoubai that’s greater.
The chuukou
If you slide the sashigane along the hypotenuse of the triangle, it should be obvious that there is a point where the short arm will intersect the bottom right corner of the triangle:
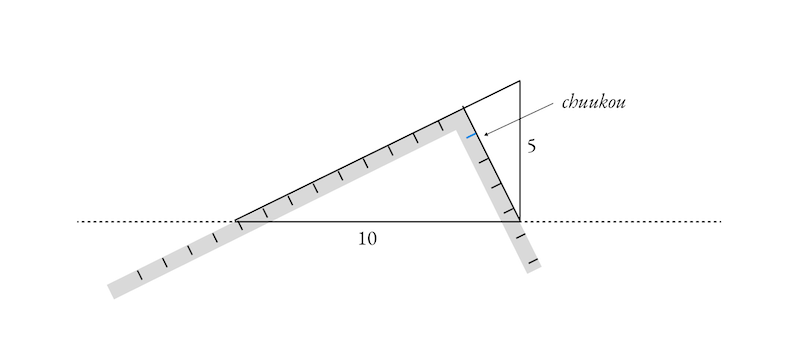
This line is called the chuukou (中勾 , pronounced “chew koh”). It divides the larger triangle into smaller parts.
More importantly, it describes the kaeshikoubai slope (relative to the horizontal).
Because the sum of the angles in any triangle always adds up to 180°, and both the overall triangle and smaller triangles contain 90° corners, the angle in the lower right of the smaller triangle formed by the chuukou is exactly the same as the original in the lower left. Similarly, the larger angles are also the same:
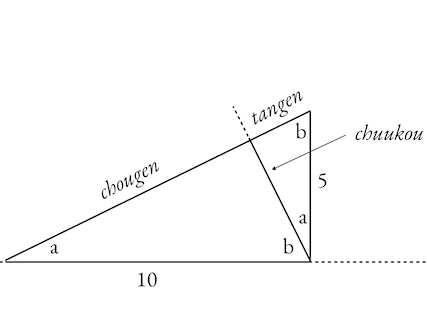
The angles labeled a are both the same, as are the angles labeled b.
Further, a + b = 90.
The gen is also broken into two parts, called the “long gen” or chougen (長玄 ) and the “short gen” or tangen (短玄 ).
Further, once you’ve struck a line that describes the slope of that gen (using
3/6, 5/10, 4.134/8.268, or whatever in that same ratio) you can now slide the
sashigane anywhere along the that line without changing the slopes: angle a
and b will always remain the same.
If, for example, you slid the sashigane until the corner reached the top of the kou (rise), you’d end up describing four total triangles (fractal triangles!):
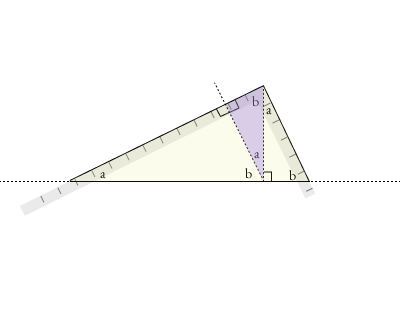
The short arm (tsumate) of the sashigane still describes the same slope as the chuukou.
There are four triangles shown: the large yellow triangle (outlined by the sashigane), the purple triangle, and the two smaller yellow triangles.
All four of these triangles have exactly the same shape. All of them contain
the same two hirakoubai and kaeshikoubai slopes (a and b) but in
different orientations.
The lengths of the sides differ, but the slopes are the same.
We will need at one more post to discuss one more critical slope before we can get to how all this is applied. There is some pretty neat mathematical magic coming up.
But we’ve already covered enough to layout some simple constructions. The next post will describe one such application.
Stay tuned!